In-vitro fertilization (IVF) has become a ray of hope for many couples struggling with infertility. While the term is familiar, the actual process can feel overwhelming without the right guidance. That’s why it’s important to clearly understand each stage involved in IVF. With the support of an experienced expert like Dr Archana Salve, couples can confidently move forward in their parenthood journey.
This blog explains the IVF process step-by-step, helping you understand what to expect both emotionally and medically.
1. Initial Consultation and Fertility Assessment
The journey begins with a detailed consultation. During this stage, your medical history, lifestyle factors, and previous treatments are discussed. Blood tests, hormonal evaluations, and ultrasound scans help assess the reproductive health of both partners.
Couples looking for IVF Treatment in Kalyani Nagar often start here, as a proper evaluation helps in customizing the treatment plan. This is also when you meet the IVF Specialist who will guide you through the entire journey.
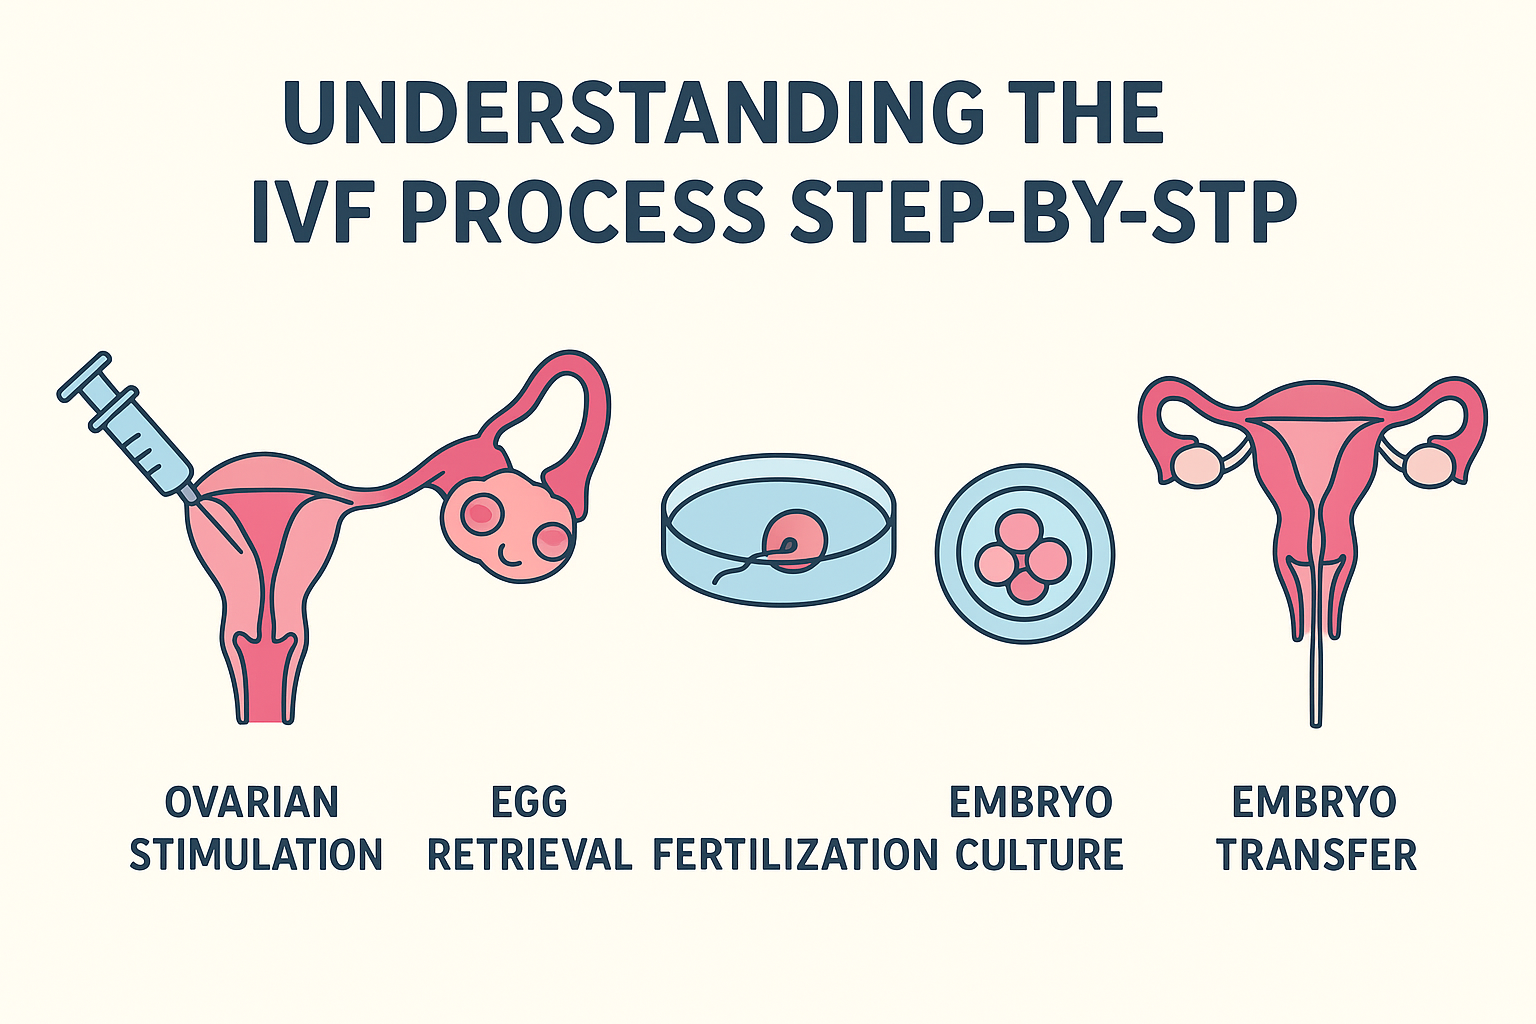
2. Ovarian Stimulation
Once the preliminary tests are complete, the next stage involves stimulating the ovaries using fertility medications. The goal is to produce multiple mature eggs instead of the single egg produced in a normal menstrual cycle.
Hormone injections are administered over 10–12 days. During this period, your doctor will closely monitor your follicle growth with blood tests and ultrasounds to ensure the right response. Patients undergoing IVF Treatment often appreciate this close supervision, which ensures safety and better success rates.
3. Monitoring and Trigger Shot
When the follicles reach the appropriate size, a “trigger shot” is given. This injection helps the eggs mature completely and prepares them for retrieval. Timing is crucial here, and the retrieval is usually scheduled 34–36 hours after the trigger.
A skilled IVF Specialist in Kalyani Nagar ensures that every step is well-timed and carefully planned, minimizing risks and maximizing outcomes.
4. Egg Retrieval Procedure
Egg retrieval is a minimally invasive procedure performed under mild anesthesia. A thin needle is guided through the vagina to collect eggs from the ovaries. The entire process usually takes 15–20 minutes.
After the procedure, the eggs are transferred to the laboratory for further steps. Most women recover quickly and can resume normal activities within a day.
5. Sperm Collection and Preparation
On the same day as the egg retrieval, a sperm sample is collected from the male partner. In cases of low sperm count or motility, methods like ICSI (Intracytoplasmic Sperm Injection) may be used.
The sperm is then washed and prepared in the lab to ensure only the healthiest sperm are used for fertilization.
6. Fertilization of the Eggs
Once the eggs and sperm are ready, the embryologist combines them in controlled laboratory conditions. Fertilization occurs either naturally in a petri dish or through ICSI, depending on the case.
Within 16–18 hours, the fertilized eggs are checked to confirm successful fertilization. For many couples, especially those seeking IVF Treatment in Kalyani Nagar, this is one of the most exciting phases.
7. Embryo Development
Over the next 3–5 days, the fertilized eggs develop into embryos. Embryologists monitor their growth and select the healthiest embryos for transfer. Some couples may also opt for advanced techniques like PGS or genetic screening to check for abnormalities.
Your IVF Specialist in Kalyani Nagar helps you decide whether to go for a day-3 transfer (cleavage stage) or a day-5 transfer (blastocyst stage), depending on the quality and number of embryos.
8. Embryo Transfer
This is a simple and painless procedure that does not require anesthesia. The selected embryo(s) are gently placed into the uterus using a thin catheter. The goal is to achieve successful implantation in the uterine lining.
After transfer, you may be advised to rest briefly and then return home the same day.
9. The Two-Week Wait
The time between embryo transfer and the pregnancy test is often the most emotionally challenging phase. Hormonal support is given to help the uterine lining maintain the right environment for implantation.
Staying relaxed, avoiding stress, and following your doctor’s advice are key during this period. Many women undergoing IVF Specialist in Kalyani Nagar benefit from counseling and lifestyle guidance during this time.
10. Pregnancy Test and Follow-Up
Around 12–14 days after embryo transfer, a blood test (beta-hCG) is performed to confirm pregnancy. If positive, follow-up ultrasounds are scheduled to confirm fetal heartbeat and development.
If the outcome is not successful, your doctor will discuss the next steps, which may include another transfer using frozen embryos or adjusting the treatment plan.
Emotional and Lifestyle Support Throughout the Journey
IVF is not just a medical process; it involves emotional, physical, and mental resilience. Guidance from a trusted expert like Dr Archana Salve ensures that couples receive not only medical care but also emotional support. Eating a balanced diet, reducing stress, maintaining a healthy weight, and avoiding alcohol and smoking can improve results significantly.
Conclusion
Understanding the IVF journey step-by-step can reduce anxiety and empower couples to make informed decisions. With the advancements in reproductive technology, success rates have increased, offering renewed hope to many families.
Choosing the right specialist plays a vital role in this journey. Couples seeking IVF Treatment in Kalyani Nagar can benefit from expert care, personalized protocols, and advanced fertility technologies. With guidance from a trusted IVF Specialist, the dream of parenthood can become a beautiful reality.
If you’re considering IVF, take the first step with confidence—your journey of hope begins with the right guidance and support.
 Select an element to maximize. Press ESC to cancel.